
Blog
26 de February de 2025
How to make an electronic signature with AutoSignature and with Adobe
To sign electronically with AutoFirma we will have to follow a very quick and simple process. In case you have any doubts, we explain it below:
With AutoFirma
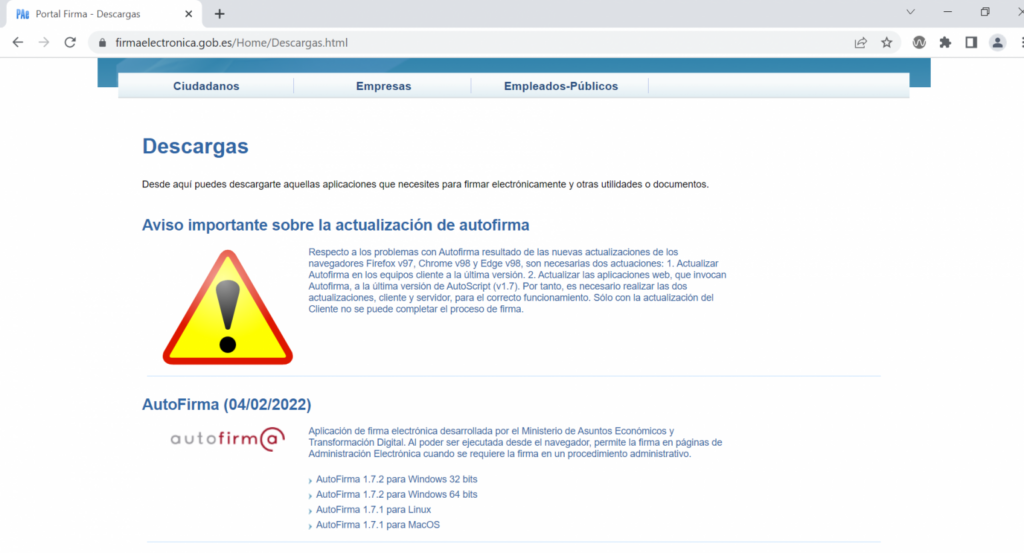
Download the AutoFirma application from the browser and install it on your computer.
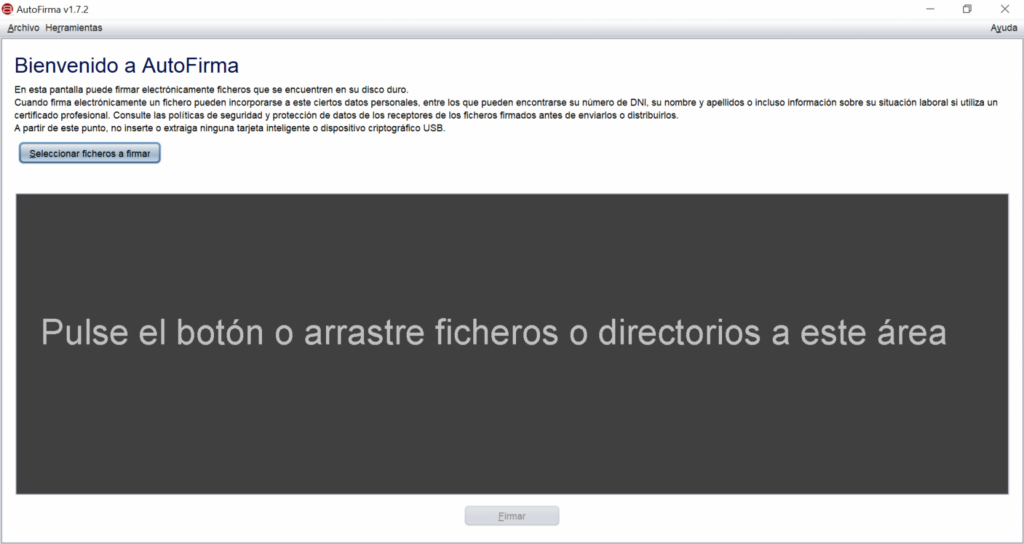
- Double click to open the application and the menu shown in the image will open. Then click on ‘Select files when signing’ or directly drag the file where indicated in the image.
Select the file you want to sign (they can be .pdf, .txt or .xml documents) and click on ‘Open’.
*For PDF documents we will explain the process a little further down.
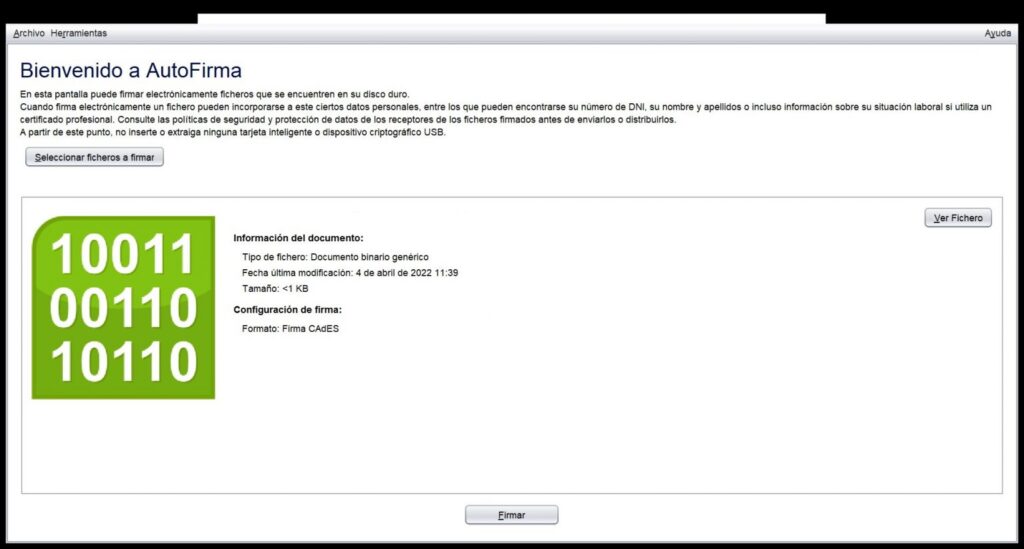
You will be presented with the screen shown below, then select ‘Sign’.
- A message will appear on the screen, then select ‘OK’.

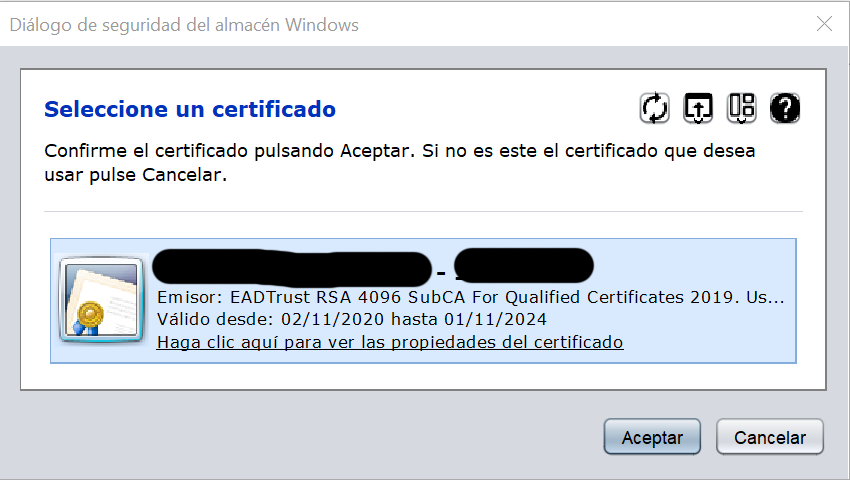
- Another message will open on the screen where you will have to select the certificate you are going to use and click on the ‘Accept’ button.
- Locate the signed file in the folder of your choice and click on the ‘Save’ button.
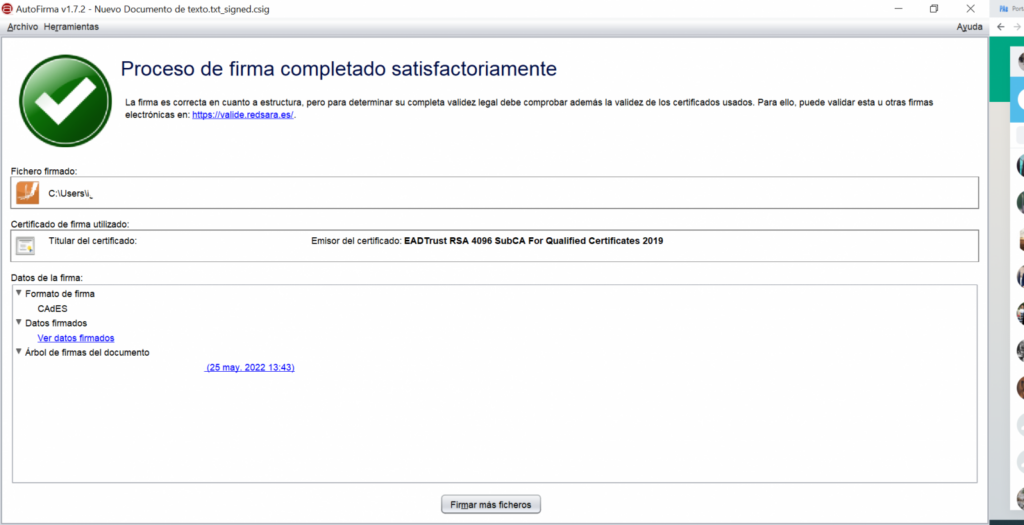
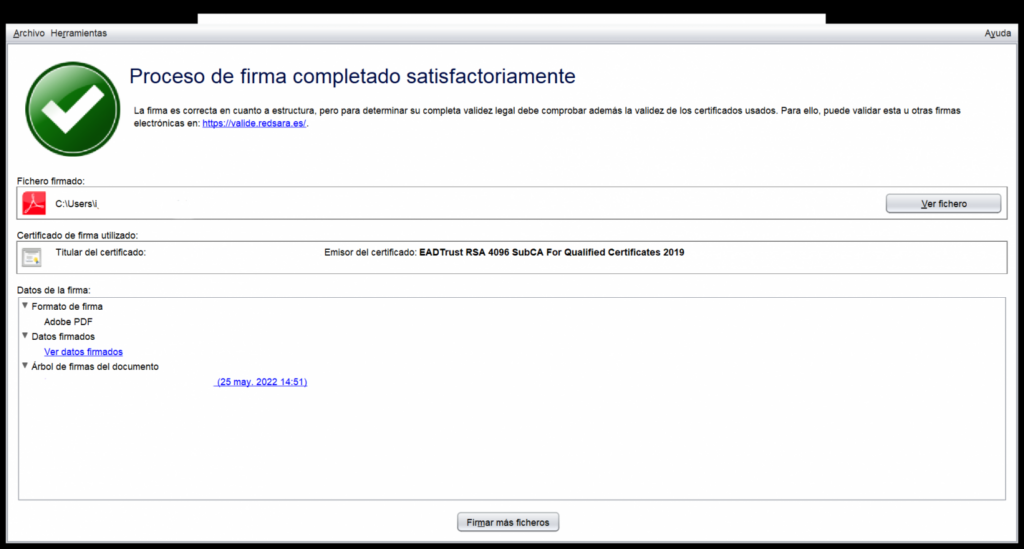
- Finally, the following message will appear, indicating that the signature has been successfully completed.
To sign a PDF document
The process will be very similar, but with some nuances that we detail below:
- Click on ‘Select files when signing’ and choose a PDF file. You can choose to make the signature visible within the file itself and insert a visible mark inside the PDF. Finally, click on the ‘Sign’ button.
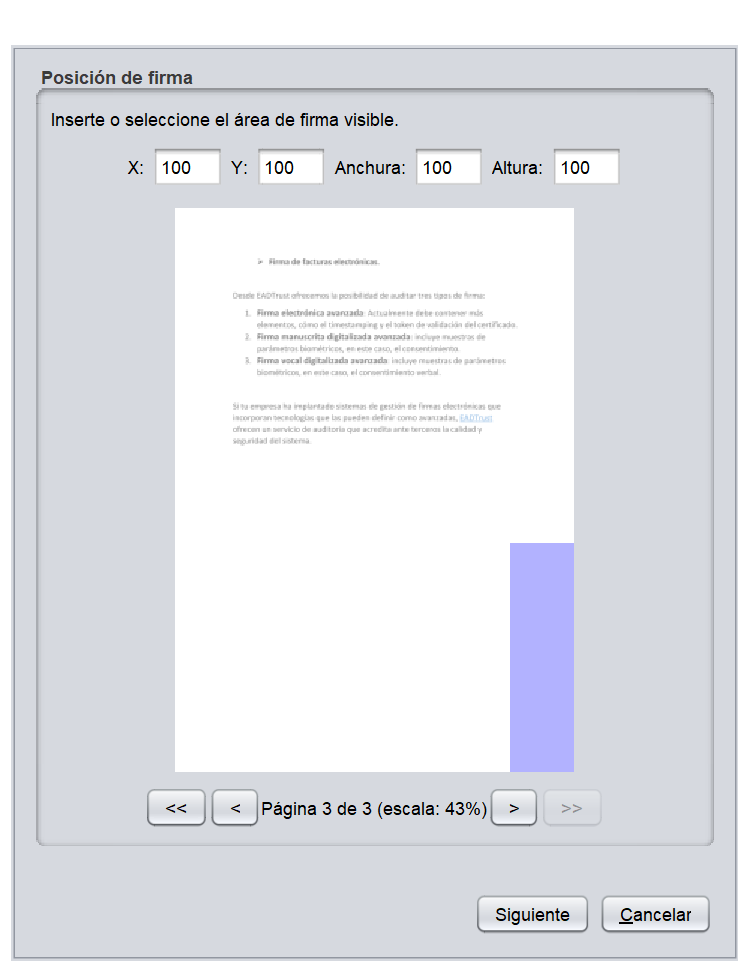
You will be shown a menu where you will have to choose the position of your signature, when you have defined it click on the ‘Next’ button.
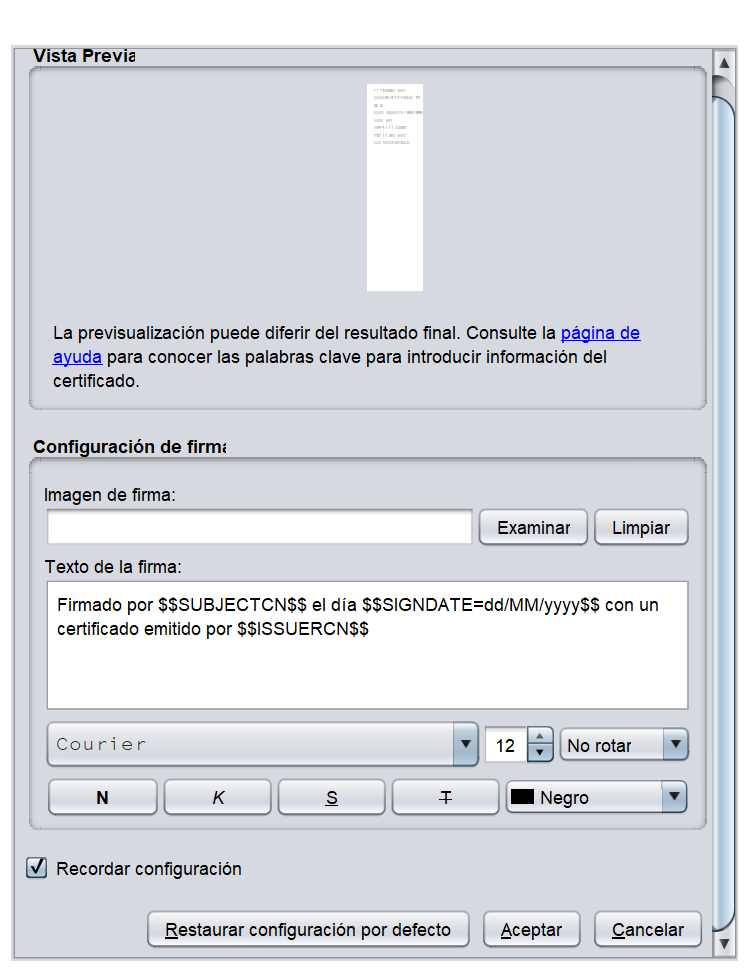
- This menu will be displayed, where you will see the text of the signature and you will be able to choose the text of the signature, the font, etc. When you have finished defining it, click on ‘Accept’.
- You will be shown another menu where you will have to define the image of the visible mark (you can include that the image is visible on all pages) and select ‘Accept’.
- You will have to select the certificate you want to use, once selected click ‘OK’.
- Enter the password set for the certificate, and click ‘OK’.
- Select the location where you want to save the file and click on ‘Save’.
- You will be shown a confirmation message.
With Adobe Reader
To sign electronically with Adobe Reader you must have installed the Adobe Acrobat Reader DC application, otherwise you must download it to your computer. Let’s go through the necessary steps to make your electronic signature correctly and very easily:
- Open the document you want to sign.
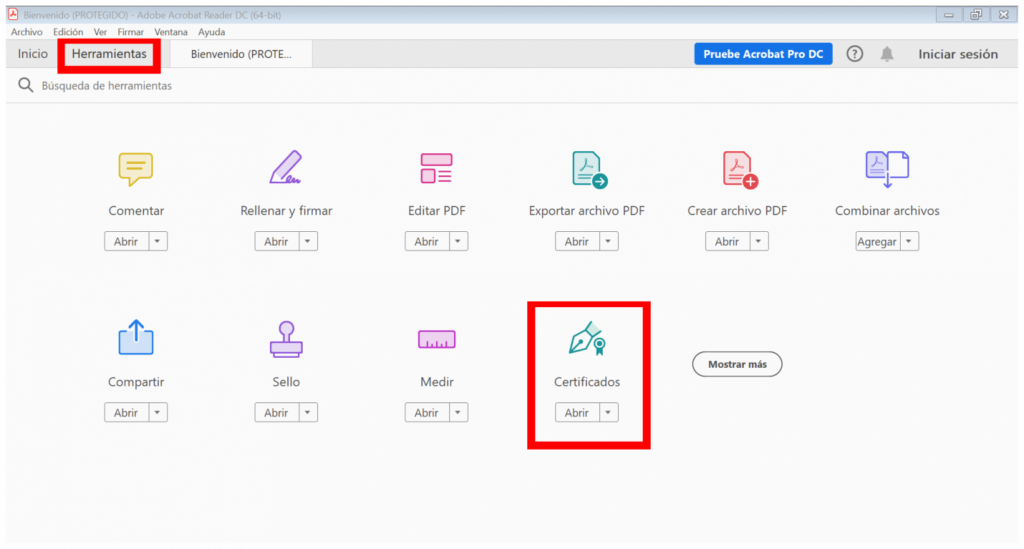
- Go to the ‘Tools’ tab. Multiple options will appear. Click on ‘Certificates’.
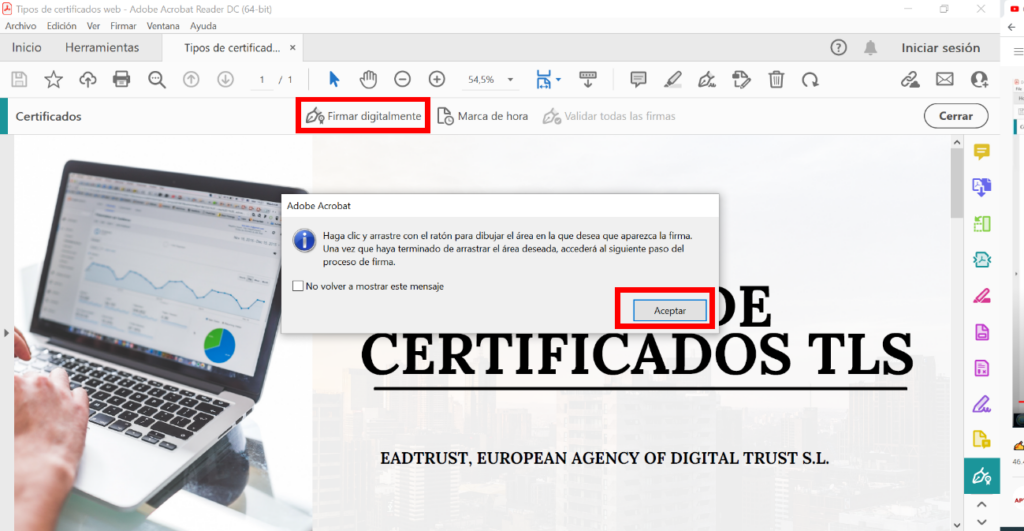
- Click on ‘Sign digitally’ and then a message will appear where you will have to click on ‘Accept’.
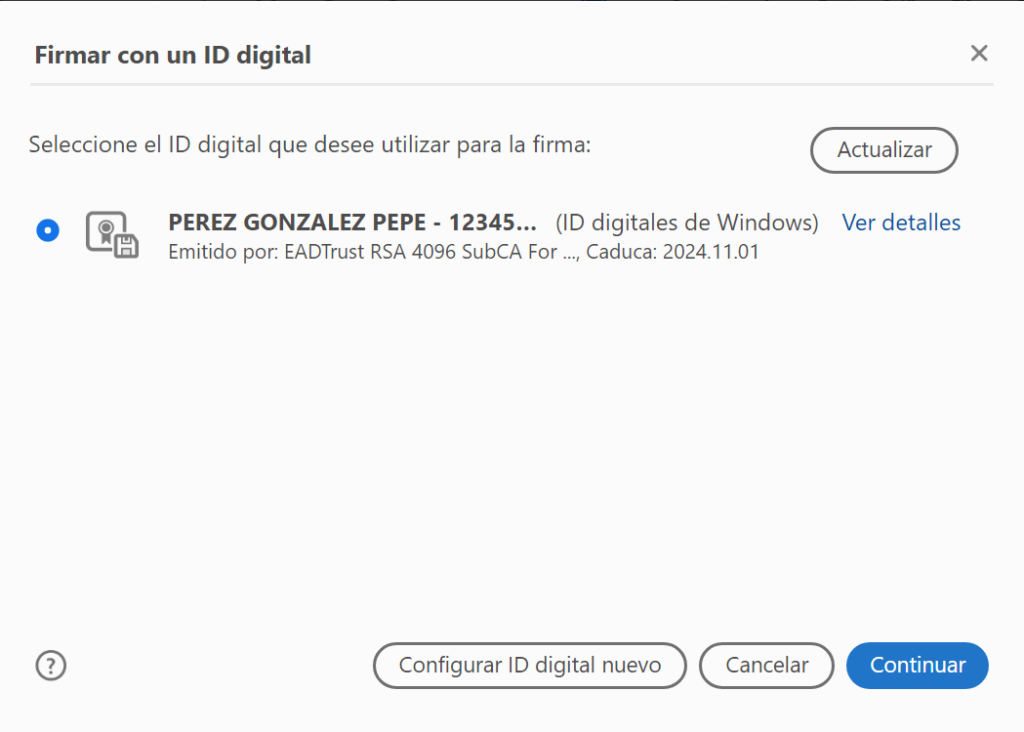
- In the space where you want to insert the signature, draw with the mouse a box of the size you consider. Then this screen will open, select the certificate you are going to use and click on ‘Continue’.
- The certificate subscriber data will appear with the signature format. If everything is correct, select ‘Sign’, otherwise select ‘Create’.
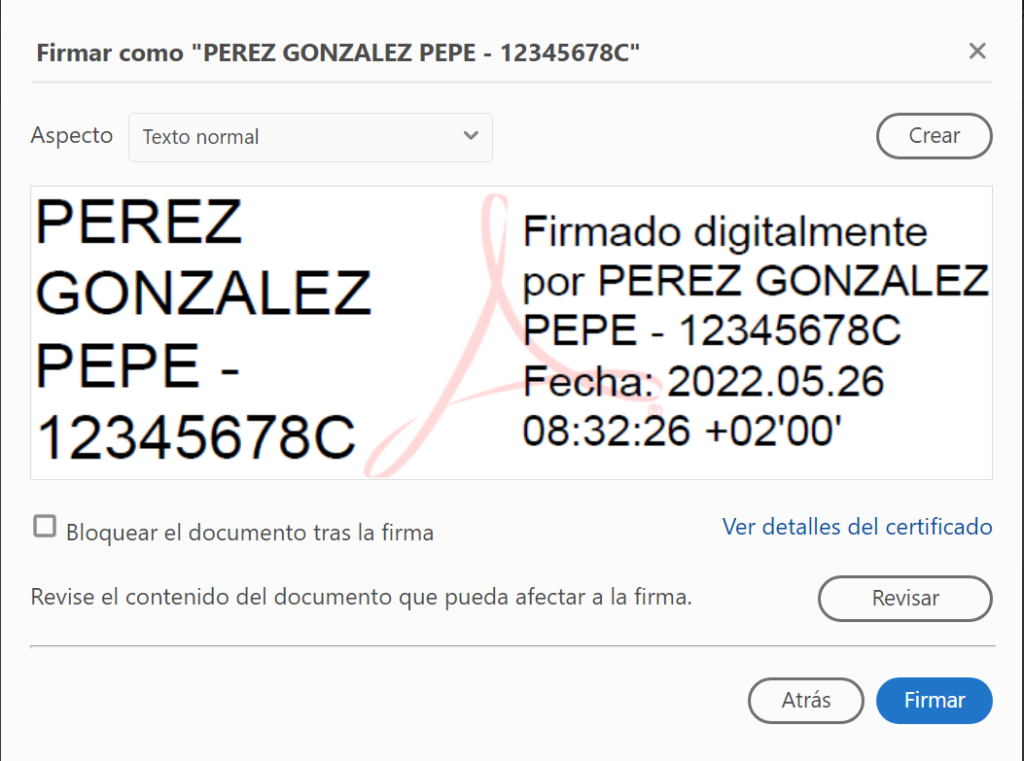
- The document will be electronically signed in the marked place and with the chosen text.

If you liked this article, please visit our blog or our website.


Sobre EAD TRUST
EAD TRUST es un prestador de servicios cualificados de confianza electrónica registrado en el Ministerio de Asuntos Económicos y Transformación Digital. Su misión es impulsar la sociedad del futuro con ideas, productos y servicios capaces de dar respuesta técnica a las necesidades jurídicas.
Suscríbete:
Buscador en el blog
Descubre blog de los Inza
Accede a contenidos especiales de actualidad digital presentados por Julián Inza, presidente de EAD TRUST y especialista eIDAS2, eFirma, eAdministración, eJusticia, Blockchain e Identidad digital.
